Last week, my father in law's apple tree lost a very large section of the tree due to the weight of the apples growing there. I saw that it was down as I left for work the next morning. As soon as I got to work, I sent my husband a message to not let his dad remove the branch until I could collect the apples!
That evening, we collected two huge bins full of small green apples!
Given the amount of apples, the easiest way to preserve them seemed to be to make applesauce. So, that's what we did! Here's how we did it.
Wash the apples. Easy peasy.
We did so by filling a sink with water and dumping them in.
By the way, the great thing about applesauce is that there really isn't any sort of recipe to follow. I've never made applesauce before this, and there was no rhyme or reason to the way we measured just how many apples to prepare. Do however many you want!
One thing worth mentioning, however, is that at this point, if you do not plan to use a food mill, you will need to peel these babies. Every single one of them. If you DO have a food mill ($25-50 at a fleet farm) then you do not have to peel.
Next step was to cut them up. We cut them into quarters, cut out the cores/seeds, then cut those pieces into halves.
I had read that if you put the apple chunks into salt water for a few minutes that they won't turn brown, so I had to test that theory out for myself. It worked! It kept the apples nice and crisp and white until it came time to cook them!
Next step: Cook them!
You'll need a couple of large pots for this. Put a couple of cups of water into a pot full of apple chunks and bring it to a boil. Make sure you stir it every few minutes until the chunks become noticeably soft and almost mushy in appearance.
Once cooked, I dumped them into the food mill and cranked away.
We had cut enough apples to fill this white bowl full of sauce!
Here's why you don't really need a recipe. Once you have your raw applesauce, you can begin adding sugar and other ingredients to suit your own tastes. Need more sugar? Add some! Since our apples were not quite mature and green and bitter from literally being a backyard apple tree, we had to add sugar. But if you are using sweeter apples like the varieties sold at the store or in your local orchards, you might not need any.
We ended up using white sugar, brown sugar, cinnamon and a dash of nutmeg. My husband and I continued to taste and add until we both loved what we had!
Next, it was time to get to canning. My favorite part! We used a water bath canner. It's basically a large pot with a rack inside that you fill with water and boil. It's not much more complicated than that. We had boiled fresh lids and clean jars so that they were heated and ready. Using our funnel, we filled pint jars with the sauce, wiped off the rim of the jars, applied the lid and put the rings on. The jars went into the canner and when the water was boiling, we started our time. Appx 20 minutes.
Then they were pulled out of the pot and set on the stove to sit and seal for the next 24 hours!
You'll know that they have sealed when the very center of the lid won't budge when you push down on it. (Remember the Snapple commercials?)
I think one of the most satisfying parts of canning is after you have removed the jars, for the next few hours you'll hear the seals popping, meaning they have successfully been sealed!
Now, at this point, I feel that it's only fair for me to point out a few things to you.
As I mentioned, I had never made applesauce before this, and a few things happened that I would have loved to have been told before I tried it for the first time.
* Most of the blogs and online sites that go over canning will mention that you need to screw the rings on 'fingertip tight' which really isn't that tight at all. Understandable because you aren't trying to force the seal, you want this stuff to seal on it's own using heat. In the case of applesauce though? Forget fingertip tight! Screw those rings on tightly! Apparently, apples are made up of appx 25% air, and as you are mashing and grinding it, you're adding more air to it. This air, in turn, will expand when it gets hot. See those seven jars up there? Only three of them sealed naturally. The other four couldn't hold up to the expanding and ended up popping their tops and oozing sauce out all over my pot. I had looked up at my hubby and exclaimed "See, I knew I could smell nutmeg!" I ended up having to clean them up, put new lids on and re-process them in the water bath again.
* The easiest way to prevent this exploding, which I will certainly keep in mind for next time, is once you have added your extra ingredients to the sauce, put it in a pot and bring it to almost boiling. This will cause it to expand in the pot so that you can ladle the already expanded sauce into your jars, put the lids on and then tightly apply the rings.
* Make sure you take a butter knife and push out all of the air bubbles. You'll see them through the jars.
*Get a buddy or two to help you chop and peel. I didn't have to peel, but even the chopping and coring took a very long time even with my hubby's help, so some entertainment during the process is muchos helpful!
Of course, always use caution when canning. You're dealing with sharp knifes and scalding hot water and jars, so it's important that you take care. Make sure you set out all of your supplies and ingredients beforehand. This is my second year canning, and it always seems like I have to scramble and use speed to get things where they need to be. But trust me, you can SLOW DOWN. Don't hurt yourself trying to do things too fast.
Feel free to ask questions if you have any! I'm no expert by any means, but this was a fun project that I will definitely do again!
*One other note: I have a glasstop stove. I have read on every single canner I've ever come across that you cannot use them on glasstop stoves. After some research, I discovered a few things. The reason why they do not recommend it is because of the size of most standard canners. They are much larger than the stove's round element, and the glass above the element is treated differently then the class outside of that circle. I bought a 'mini' canner, which I believe is an 11.5 QT canner. I am able to fit 7 pint jars in there, and it's a safe size to use on my particular glass stove top. Every one is different, so you'll want to do your own research before trying it on your glasstop. However I have not encountered any problems at this point with my glasstop stove and my canner.
Hope this is helpful!
~~~~~~~~~~~~
Keep Calm & Party On!
Fishtail Cottage - Tuesday Garden Party!
Showing posts with label Gardening. Show all posts
Tuesday, August 5, 2014
Monday, July 28, 2014
Our Garden
This is the first year that I've planted my own vegetables... and have succeeded in actually getting veggies from the plant! I've attempted several different ways to grow plants from seeds and never even make it to putting them in the ground because they die.
This year, I gave up the seed growing thing. Apparently, seeds aren't my thing. So I went on a shopping spree at our local everything store (they have everything... literally) and raided their greenhouse!
For my wedding gift last year, I asked my hubby to build me a raised garden bed. I wasn't confident enough in my gardening skills to start digging up our lawn to make a garden, and various gardening blogs told me that raised beds were relatively easy to maintain, so it seem like the best option. I love it and I couldn't wait to get started this spring. In may, after picking out my plants, this is what we had.
I thought I'd spaced everything pretty well. Turns out, I hadn't. I'd gone way overboard, especially on the tomatoes. But I would remain blissfully unaware of that until about the first of July when they began growing out of control! It's all still working out alright though. I transplanted my poor pepper plants into containers so that the tomatoes quit looming over them and they have taken well to the move.
Today, our little garden is a green mass of giant leaves and vines, and everything we've planted is bearing fruit!
Our zucchini plant is growing these things like crazy. I printed off several recipes that incorporate zucchini so that I can begin harvesting them and not letting them go to waste! Looks like I'm going to need to learn how to can a lot more than I currently do!
Oh, and yesterday, our first red cherry tomato!
This year, I gave up the seed growing thing. Apparently, seeds aren't my thing. So I went on a shopping spree at our local everything store (they have everything... literally) and raided their greenhouse!
For my wedding gift last year, I asked my hubby to build me a raised garden bed. I wasn't confident enough in my gardening skills to start digging up our lawn to make a garden, and various gardening blogs told me that raised beds were relatively easy to maintain, so it seem like the best option. I love it and I couldn't wait to get started this spring. In may, after picking out my plants, this is what we had.
I thought I'd spaced everything pretty well. Turns out, I hadn't. I'd gone way overboard, especially on the tomatoes. But I would remain blissfully unaware of that until about the first of July when they began growing out of control! It's all still working out alright though. I transplanted my poor pepper plants into containers so that the tomatoes quit looming over them and they have taken well to the move.
Today, our little garden is a green mass of giant leaves and vines, and everything we've planted is bearing fruit!
Our zucchini plant is growing these things like crazy. I printed off several recipes that incorporate zucchini so that I can begin harvesting them and not letting them go to waste! Looks like I'm going to need to learn how to can a lot more than I currently do!
Oh, and yesterday, our first red cherry tomato!
Monday, July 1, 2013
Flowers
Let me begin with an excuse for my absence. There is no other way to explain except to tell you that sometimes, you have to choose between living life or blogging about living life.
But I'm here now, and I have a lot to share with you!
I really love flowers. I've always wanted to put time into improving our landscaping around the house, but my thumb is far from green. Plus, if you are starting from scratch, it's expensive to do a lot of it.
For my bridal shower, my little sister gave me this beautiful garden tool set.
I have been chomping at the bit to get these babies dirty! She also gave me a pair of gardening gloves, a bucket to store everything in, and a knee pad that I would have never thought of myself, but it has so saved my knees from many pains since I started digging.
Since our garage sits back behind our home, we tend to use the back door to come and go. The front is only used by visitors who haven't been yelled at to go to the back yet. (I'm only yelling because the dogs are barking, not because I'm mean... usually).
The front stoop has this little brick bed and I've been thinking about putting flowers there for many years now. But since I never see it, I always forget. Well, I didn't forget this year.
Here is what it looked like after years of my neglect and ignorance
I can't even tell you what it is that was growing in there. I can tell you that I didn't put it there.
This poor front stoop has just not been given much attention. I'm working on fixing that finally. I grabbed some pretty pink perennials and nutrient filled dirt and got to work.
Please excuse all of the weeds and debris that are scattered everywhere. Jeez, and that puppy welcome mat has seen better days huh... Work in progress I said!
If I've learned anything from my past gardening failures, it's that you need to pay attention to the sun/shade requirements of the plants you are putting in the ground. I choose these particular flowers for two reasons: First, because they do not need to be replanted every year, I will get at least one more summer out of them. And secondly, because they met the sun requirements of the spot that I needed them for.
I did not get any in between shots because there was a swift, embarrassing battle with a nest of spiders that I would prefer not to relive. I might have screamed just once...
So here is the end result.
I made sure to leave them some room to expand should they feel the need. Less is more and it gives it a 'groomed' appearance.
But I'm here now, and I have a lot to share with you!
I really love flowers. I've always wanted to put time into improving our landscaping around the house, but my thumb is far from green. Plus, if you are starting from scratch, it's expensive to do a lot of it.
For my bridal shower, my little sister gave me this beautiful garden tool set.
I have been chomping at the bit to get these babies dirty! She also gave me a pair of gardening gloves, a bucket to store everything in, and a knee pad that I would have never thought of myself, but it has so saved my knees from many pains since I started digging.
Since our garage sits back behind our home, we tend to use the back door to come and go. The front is only used by visitors who haven't been yelled at to go to the back yet. (I'm only yelling because the dogs are barking, not because I'm mean... usually).
The front stoop has this little brick bed and I've been thinking about putting flowers there for many years now. But since I never see it, I always forget. Well, I didn't forget this year.
Here is what it looked like after years of my neglect and ignorance
I can't even tell you what it is that was growing in there. I can tell you that I didn't put it there.
This poor front stoop has just not been given much attention. I'm working on fixing that finally. I grabbed some pretty pink perennials and nutrient filled dirt and got to work.
Please excuse all of the weeds and debris that are scattered everywhere. Jeez, and that puppy welcome mat has seen better days huh... Work in progress I said!
If I've learned anything from my past gardening failures, it's that you need to pay attention to the sun/shade requirements of the plants you are putting in the ground. I choose these particular flowers for two reasons: First, because they do not need to be replanted every year, I will get at least one more summer out of them. And secondly, because they met the sun requirements of the spot that I needed them for.
I did not get any in between shots because there was a swift, embarrassing battle with a nest of spiders that I would prefer not to relive. I might have screamed just once...
So here is the end result.
I made sure to leave them some room to expand should they feel the need. Less is more and it gives it a 'groomed' appearance.
Wednesday, May 29, 2013
Raised Bed
I've been trying to get a real garden going for a few years now. I kept trying to start seeds and then never transferred them and then they died of course because they outgrew their little peat pots. Oops.
Because of my lack of gardening skills in the past, I've been hesitant to dig up a hunk of my yard for a garden that potentially may not work. But without dirt, my little seedlings can never grow! So this year, we're changing it up.
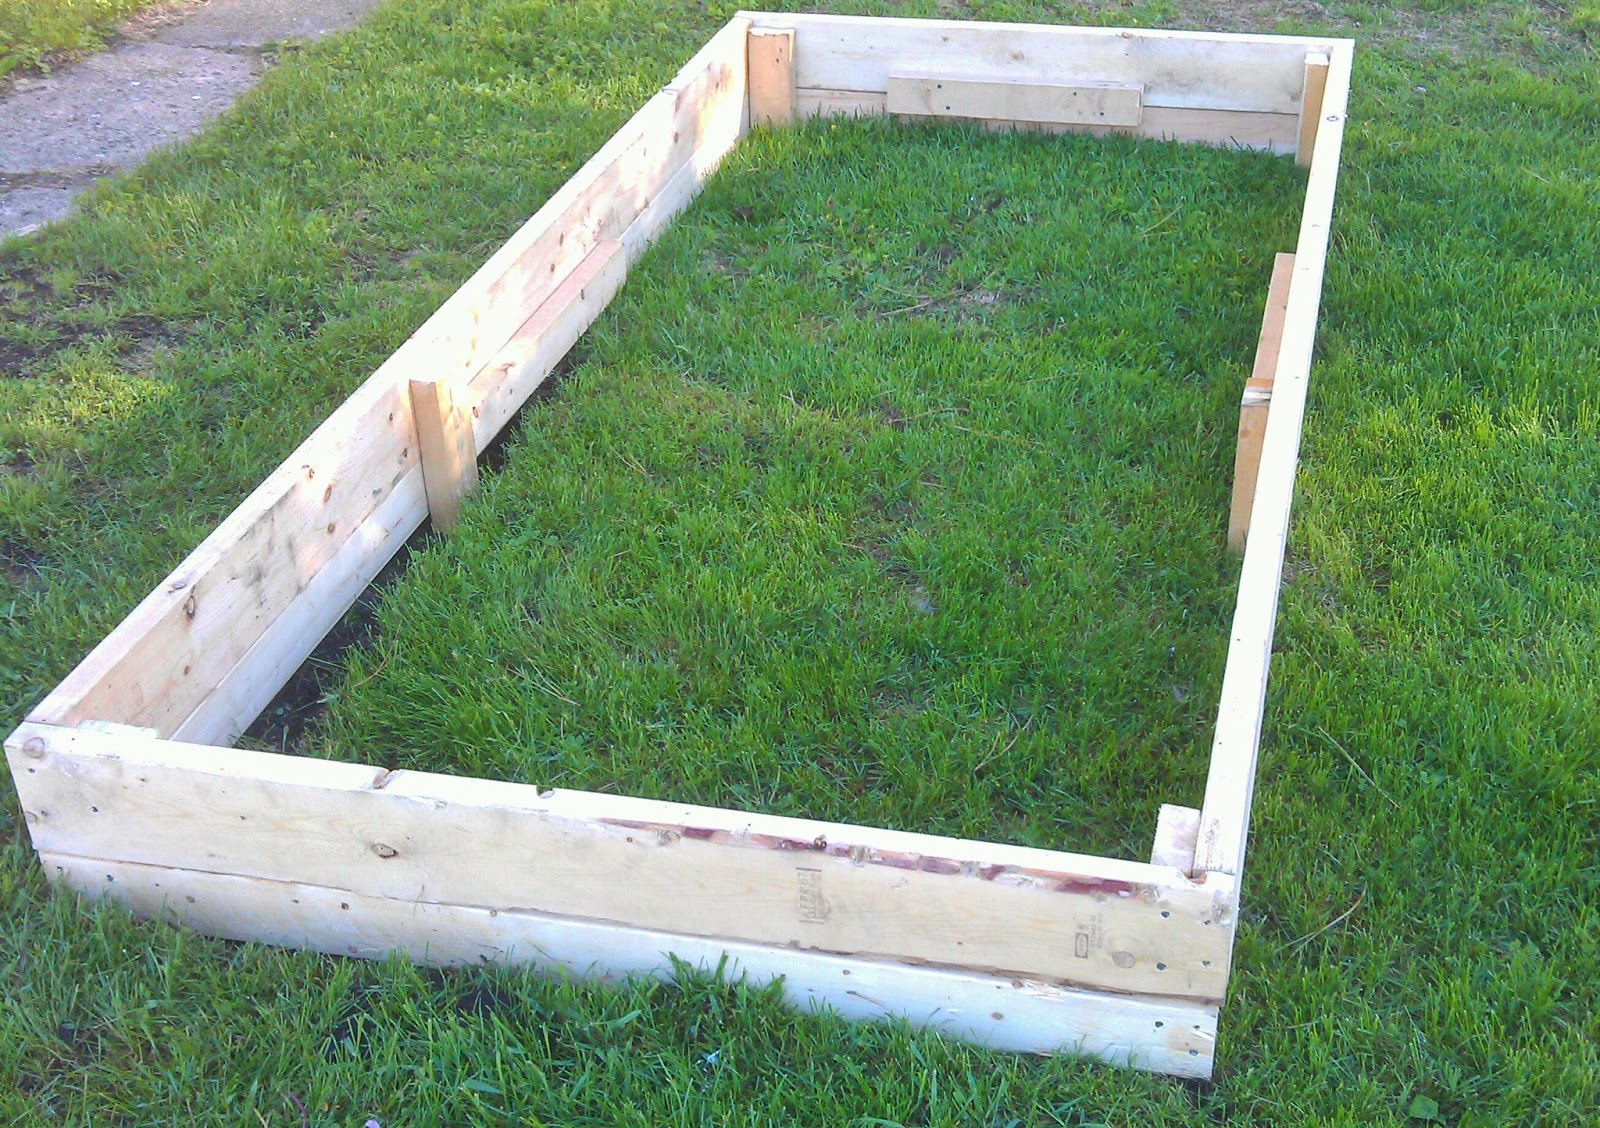
For my wedding gift, I asked Red to build me a raised bed. Just one. We'll see how this one goes and if I succeed, maybe next year I'll add a second. He finished it last week and I'm so excited to get it filled and start planting!
It's 8'x 4'x 12". It needed to be level so instead of jacking it up, we dug it into the ground. The shallowness of that area won't be a problem.
We've got it sitting in an area that gets equal parts shade and sun. It's really the only option, as any other area of the yard gets full on sun or full on shade.
After 18 inches of snow just a few weeks ago, it will be nice to take my first free weekend in months and get some yard work done. When I was a teenager, if I'd been asked if I'd ever be excited about yard work, I'd probably have given you the middle finger or something equally immature. A decade later, I think it's going to be the highlight of my weekend!
I'm starting with easy vegetable plants and flowers. Half and half maybe. Tomatoes, jalapeno peppers, cucumbers, some sort of squash. The Burpee seed packs I picked up had bonus basil seeds in them so we're giving that a try to. For flowers, all I've attempted is Sunflowers.
So far everything has sprouted and they have survived the last few nights outside in their peat pots. I hope to transplant them all this weekend.
The shade is provided by this beauty.
Which bloomed gorgeous pink less than 48 hours after my wedding. (We got married under it) What the hell.
Send me some green thumb vibes will ya?
Emily
Because of my lack of gardening skills in the past, I've been hesitant to dig up a hunk of my yard for a garden that potentially may not work. But without dirt, my little seedlings can never grow! So this year, we're changing it up.
For my wedding gift, I asked Red to build me a raised bed. Just one. We'll see how this one goes and if I succeed, maybe next year I'll add a second. He finished it last week and I'm so excited to get it filled and start planting!
It's 8'x 4'x 12". It needed to be level so instead of jacking it up, we dug it into the ground. The shallowness of that area won't be a problem.
We've got it sitting in an area that gets equal parts shade and sun. It's really the only option, as any other area of the yard gets full on sun or full on shade.
After 18 inches of snow just a few weeks ago, it will be nice to take my first free weekend in months and get some yard work done. When I was a teenager, if I'd been asked if I'd ever be excited about yard work, I'd probably have given you the middle finger or something equally immature. A decade later, I think it's going to be the highlight of my weekend!
I'm starting with easy vegetable plants and flowers. Half and half maybe. Tomatoes, jalapeno peppers, cucumbers, some sort of squash. The Burpee seed packs I picked up had bonus basil seeds in them so we're giving that a try to. For flowers, all I've attempted is Sunflowers.
So far everything has sprouted and they have survived the last few nights outside in their peat pots. I hope to transplant them all this weekend.
The shade is provided by this beauty.
Which bloomed gorgeous pink less than 48 hours after my wedding. (We got married under it) What the hell.
Send me some green thumb vibes will ya?
Emily
Thursday, May 9, 2013
In The Backyard
Spring has most definitely arrived.
After waking up to this exactly one week ago...
...it's safe to say that Minnesota is ready for spring.
There is a shrub/tree/bush thing of some sort that lives in our backyard next to the patio. She's ragged and she's leaning, but folks in our small town tell us that she's been there since our house was built in the 1890's. That makes her more than 100 years old and Red and I have agreed that we will not tear her down. The only way that baby is coming out is if something weather-related finally gets her. She's been attacked by numerous storms in the past. Last week's snow storm, which took down big, sturdy trees left and right in several towns, dropped so much heavy snow on her that she was nearly touching the ground. Red and I thought it was the end. But by a few nights ago, she had righted herself and I sat down to take some photos.
This one is my favorite, of her base:
Strong and sturdy.
Emily
After waking up to this exactly one week ago...
...it's safe to say that Minnesota is ready for spring.
There is a shrub/tree/bush thing of some sort that lives in our backyard next to the patio. She's ragged and she's leaning, but folks in our small town tell us that she's been there since our house was built in the 1890's. That makes her more than 100 years old and Red and I have agreed that we will not tear her down. The only way that baby is coming out is if something weather-related finally gets her. She's been attacked by numerous storms in the past. Last week's snow storm, which took down big, sturdy trees left and right in several towns, dropped so much heavy snow on her that she was nearly touching the ground. Red and I thought it was the end. But by a few nights ago, she had righted herself and I sat down to take some photos.
This one is my favorite, of her base:
Strong and sturdy.
Emily
Thursday, April 25, 2013
Spring
If you read any other Minnesota blogs, then you know that winter here just won't let up. It's rain and sleet and snow then it warms up and half melts and then it refreezes and then the roads aren't fun to drive on and I could go on and on.
I determined last weekend that I was going to move forth with my plans for a garden this year and I stocked up on the supplies and seeds that I'd need.
I decided to take photos of all angles of my house to show how barren it is, which I'll post later. But in the meantime, while I was out snapping photos something caught my eye.

My lilac bushes are beginning to bud.
Spring will come, whether Ole Man Winter lets go or not!
Emily
I determined last weekend that I was going to move forth with my plans for a garden this year and I stocked up on the supplies and seeds that I'd need.
I decided to take photos of all angles of my house to show how barren it is, which I'll post later. But in the meantime, while I was out snapping photos something caught my eye.
My lilac bushes are beginning to bud.
Spring will come, whether Ole Man Winter lets go or not!
Emily
Subscribe to:
Posts (Atom)